Beginning in the middle 80’s my go to place for art supplies had anything I’d want so when I got money I bought as many supplies as I could afford. Their paper selection was wide and it allowed me to narrow down from the many possibilities to the ones best suited to my work. That meant Murillo, Lenox, and Stonehenge. I bought canson papers also, and my tools of choice were colored pencils. I then complimented my pencils with soft pastels, conte, charcoal, and graphite. The store had much more so it was still the right place to go for the next big thing.
Starting in 2006 I was ready to paint. Acrylics made the most sense because they dry fast and are non odorous. I’d begun a 100 art work self-assignment too, so much more art was being created than at any previous time. The transition from occasional artist to one who lived and breathed it was underway.
I began to see the wisdom of canvas over melanine panel. Boards and panels were heavy.
My favored store sold stout stretcher bar frames. Since I preferred to paint larger works, I needed ‘stout’. Many times I went there with a shopping list and came home with a pile of lumber bungeed down on the trunk rack of my Z3.
The stretcher bars were good quality solid wood, but it wasn’t until much later that I discovered that they’d sold me an assortment from two different brands that didn’t fit each other. Somehow I build many canvases without running into the problem. My goodly supply of stretcher bars became very limiting because I couldn’t fit together frames of the dimensions I needed without mixing the unmixable pieces.
When that store went away, the new one sold heavy stretcher bars but they were made of pieces glued together and I decided not to be part of that. It was probably structurally sound but the look was cheap to me. The cost certainly wasn’t. There was no decrease in the cost over solid wood. That and the fact that the stretcher bars came in increments of two inches only in even lengths (24″, 26″, 28″, etc) made me start looking for an alternative.
I designed a heavy bar and paid a woodworker to mill me about $500 dollars worth of kiln dried hemlock in eight foot lengths. That was two or three years ago so I’m certain that it’s dry. It came dry, but I wanted to make sure. It’s been stacked up in a dry garage all this time and I see no warpage.
I did build one canvas from it and that was quite a bit of work to do. I paid to have corner bracing made also. The canvas took me more than half a day to build. Probably took an entire day from start to finish including stretching and priming it.
The build quality wasn’t what I wanted with the 45 degree miters.
So tonight I had a look at the commercially produced stretcher bars and did some measureing and planning.
I want to see if it’s worth the trouble to create the friction fit corners like the store bought bars have.
Here’s the plan:
Cut the bars to the desired length. Instead of mitering the cut, make it 90 degrees. Then see the photo that I made for this post.
Step 1: There will be a back side and a canvas side to each bar. lay out a 45 degree cut on the inside of each end as if to miter the piece for assembly. Then cut that only a quarter of an inch deep.
Step 2: Cut another quarter inch wide swath of wood starting half an inch from the back side of the bar which is the side that’s flat and doesn’t get the canvas.That cut goes in 2 5/16″ from the end on the outer side of the bar. Outer means when the canvas is stretched, that will form the perimeter. That inner cut does not terminate at 90 degrees but is 70 degrees measured from the perimeter side – 110 degrees from the inner side.
Step 3: cut another 45 degree miter on the top side of the bar. No need to measure the depth because it ends with the space created by the cut in step 2.
This should yield friction fit corners identical to the store bought units.
The reason my store bought units from two different brands don’t fit each other so well is that while one sticks to quarter inch/quarter inch/quarter inch spacing on the joins, the other starts with a three eighths of an inch cut then holds to the quarter inch dimensions. So the bars are 1/8″ off from each other when put together.
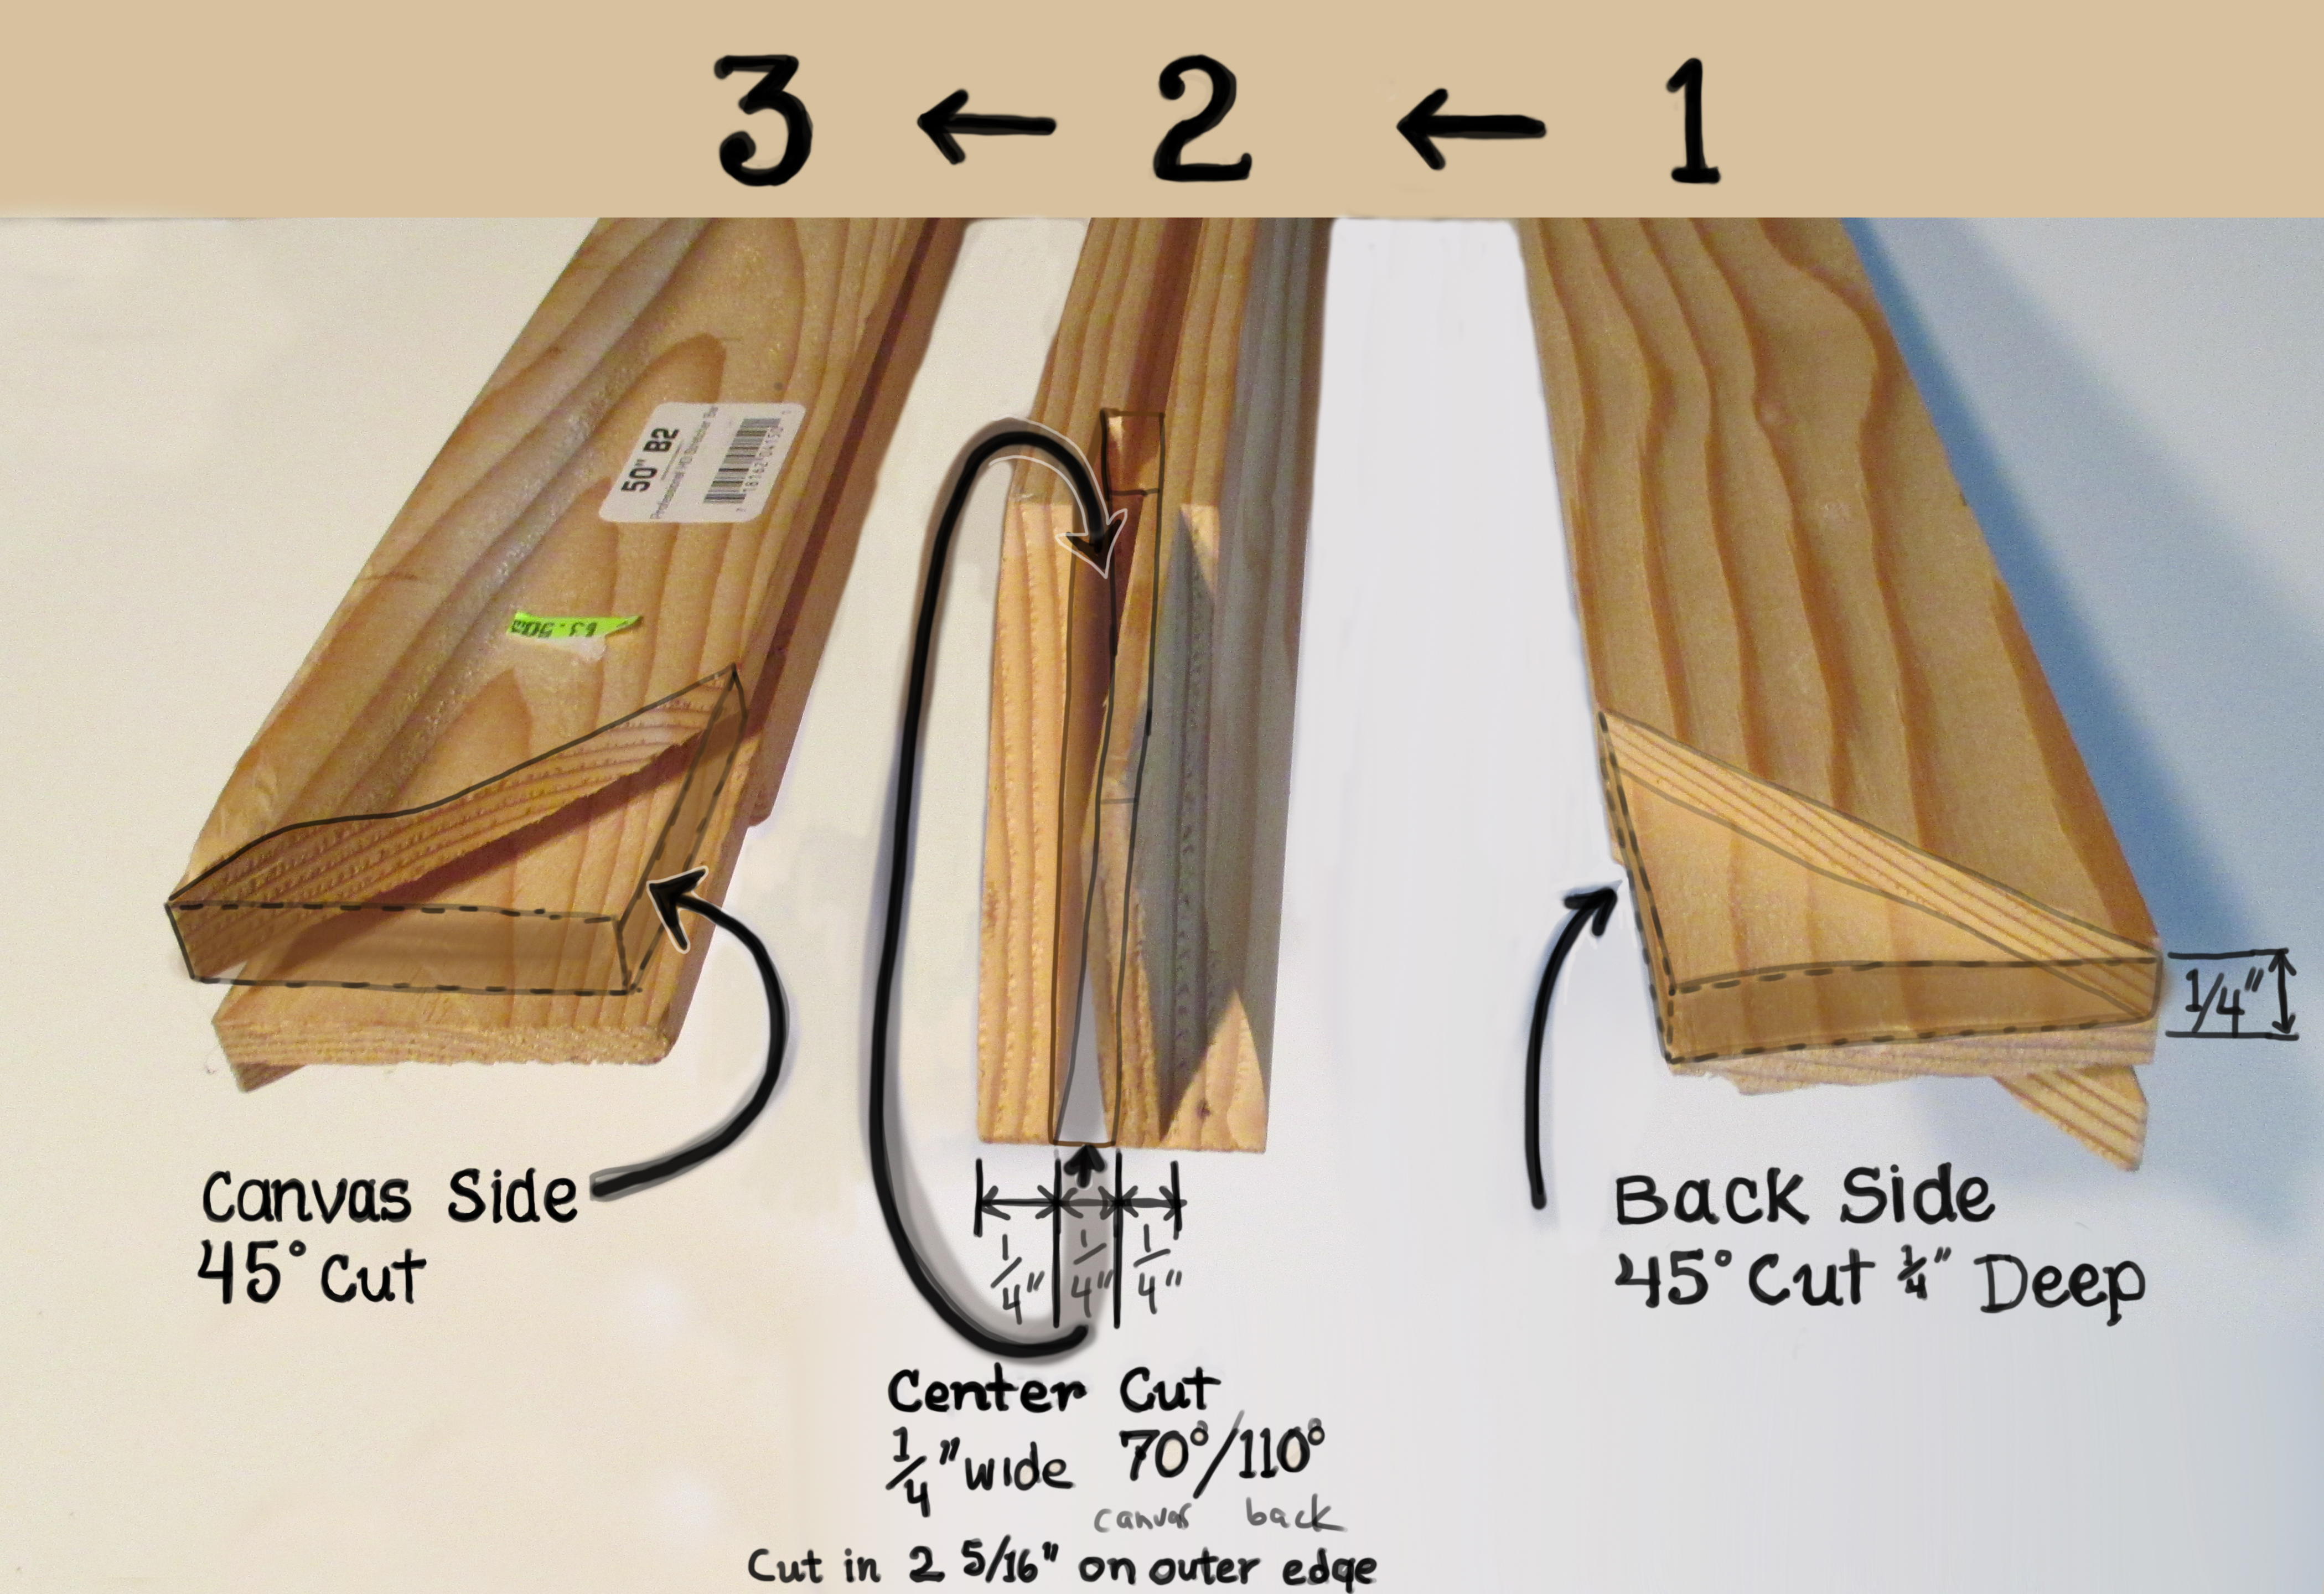
Stretcher bar cut measurements
