One day I got a call.
“My tire looks flat. I don’t know what to do”
Put the spare on and go to the tire place.
“Can you?”
It’s not my car.
“I honestly don’t have a clue. Will you please help?
.
It is true that the caller is and may remain for life absolutely clueless about machines. I went to her.
As it turns out, she would not have made much headway and may not have succeeded even if endowed with correct levels of enthusiasm. The spare tire had probably never seen daylight after the car was first sold 17 years ago. It was protected in a case and cage that required instructions to open. The car is upscale, and has it’s own basic tool kit which I found used for the repair, first jacking up the corner of the car that had the flat tire. There was not enough air in it to get us to the repair facility.
I’d owned the vehicle and had always dreaded to have to get at the spare because I didn’t know how. That should have made me eager to check it out. I know how this works – the thing you dread is the thing you’ll deal with. Better in sun than the night. Better in the dry day than the bluster of winter rain.
Owning the Europa effectively burned that out of me by repeatedly teaching me that whatever the problem is that ails the machine, it is what it is and takes what it takes to fix it. I have my limits, but those have been greatly expanded. At least I don’t have to fabricate parts from scratch for this more modern vehicle. If needed, they can all be purchased.
Before selling it I had replaced the brake pads and rotors with new, just to make sure the buyer had a fresh start. Amazingly, there was half the life left in the front pads after 60,000 miles of use.
The rear wheel had been difficult to remove when I did the brakes a year and a half ago and it was still acting like it was glued to the hub. I laid on the concrete behind the car and I kicked the tire from the inside which quickly broke it loose.
The filthy spare tire was useless. So I rolled the flat into the passenger seat of my Europa and drove away.
Les Schwabbs, the tire repair place, was busy, and this was a free service that was low on their priority list and the sun was nearly set by the time they’d repaired four nail punctures and a mystery leak.
Back at the office, had to install the wheel under the cover of dark, with assistance from someone’s mobile phone as a flashlight for locating the lug bolt holes but in less than three hours from the time I arrived, the car was driveable again.
“Air up the other three. Put 34lbs in each one, ” I told her.
Predictably, it fell on deaf ears. She just wanted to get home and fix dinner.
Two days later I went to the office and got the car to finish the job. I have a key. It had dissappeared years ago, forcing me to replace it with a new one and reprogram the locks or the key or whatever it is that lets them communicate together. The key turned up under the floor mat of another roadster that I’d sold to a guy who sold it to another guy who sold it back to me. Aparently neither of them ever took the mat out. So I have the emergency spare for just such an occasion as this!
With absence one forgets how refined the newer cars are. I took it to the air station and found three tires were low, which I corrected before returning the vehicle to it’s parking space.
The drive was such a contrast to my Brit cars from the seventies. Powerful, smooth, tight, quiet, refined! Tall stance though. Like the Landie, it’s a sit up car whereas if someone were to chat with me while I sat in my Europa and they sat outside it on a kitchen chair, I’d be looking up their nose. It was a very nice ride.
Then I hopped in my Europa to go back home and paint.
Which is when the trouble began. The horn went off randomly. That was bad enough, but the car came with a Stebel Brio, a three tone air horn whose melody reminded me of an ice cream truck. That was on my list of matters have a look at but as a low priority because I don’t much need a horn. Especially not a play car horn.
All the way home it went off randomly, infuriatingly, embarrassingly. Maybe no one actually believed it was a real horn or that it came from my car.
There were rattles and the clutch was back to it’s grabby self on take off. Compared to the Z3 it was rough. The normal thrill was greatly attenuated and home could not arrive soon enough!
Over the next week or so the Lotus remained parked while I went to work at the easel, attending to it when paintings had to dry.
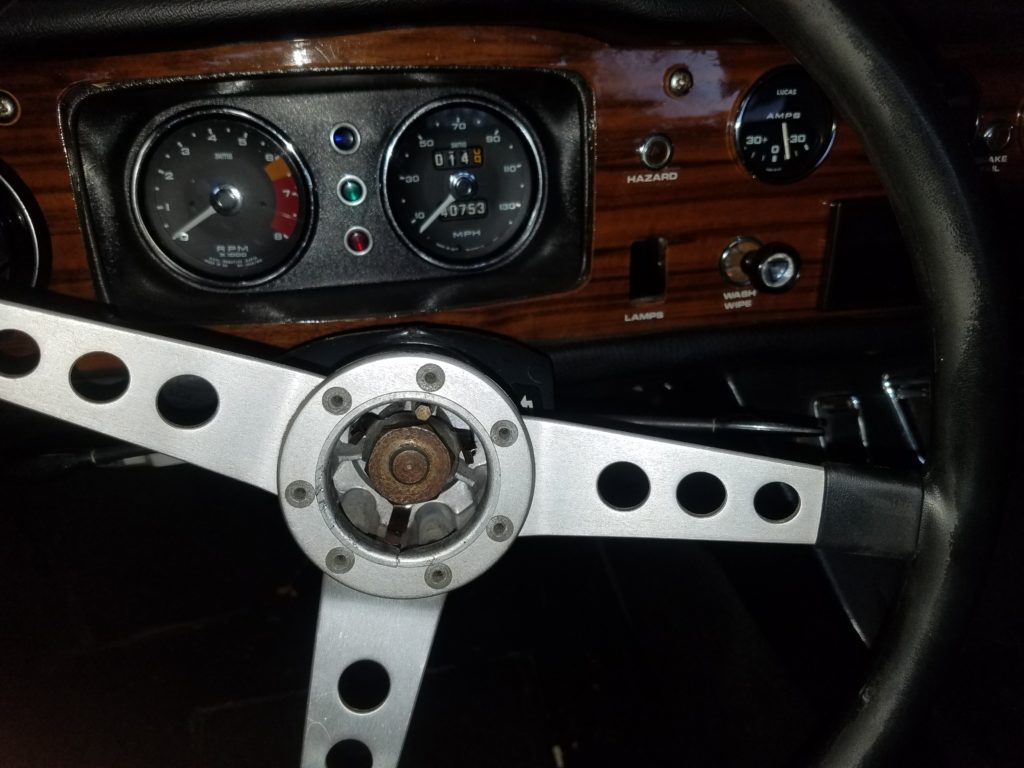
I removed the steering wheel. I cleaned up the parts and learned how they worked. It didn’t take long to match the components with similar parts in Spitfires and GT6’s. At that point I could read forums.
I compared the parts of each of my Europa cars and ordered some parts (Horns for the Type 54 and contact plunger for the type 65 plus a part that incited my imagination to help cure another problem).
In the end, I figured it out and also installed a “real” set of horns and in the process learned how to use automotive relays and wire them up correctly. Now I can finish my Land Rover with its fog lights and on board air compressor.
My Europa gained $2000 in value as far as I am concerned. The new horns confidently demand attention – NOW!
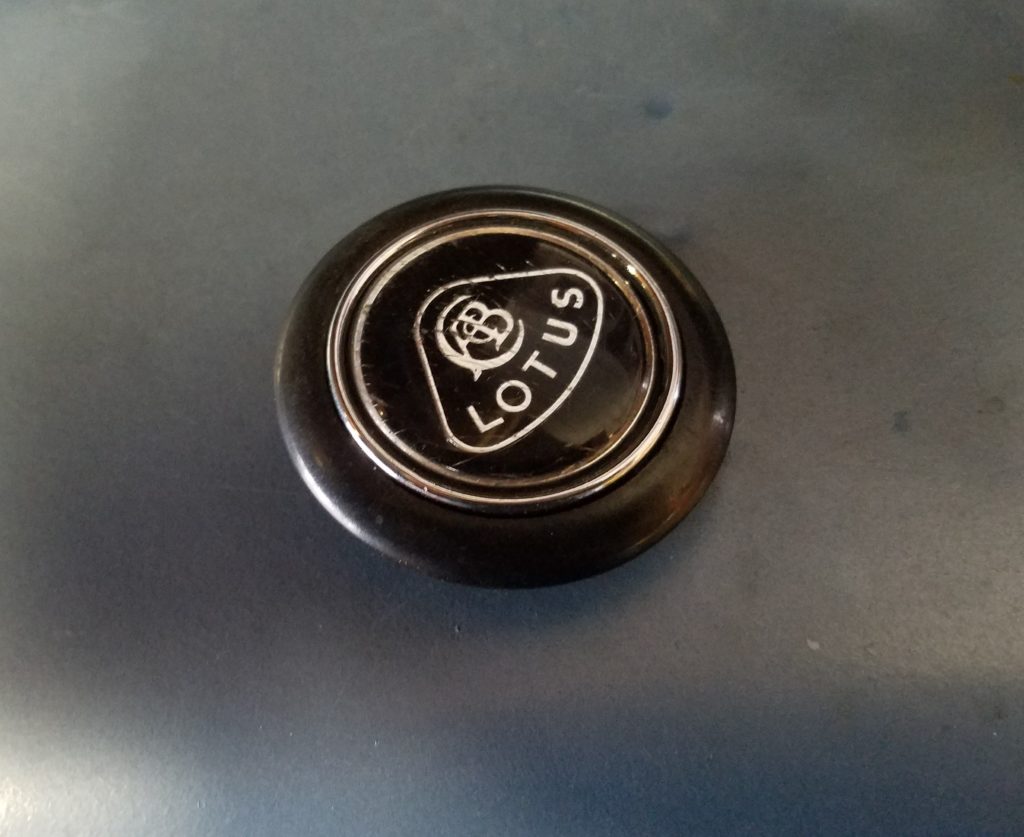
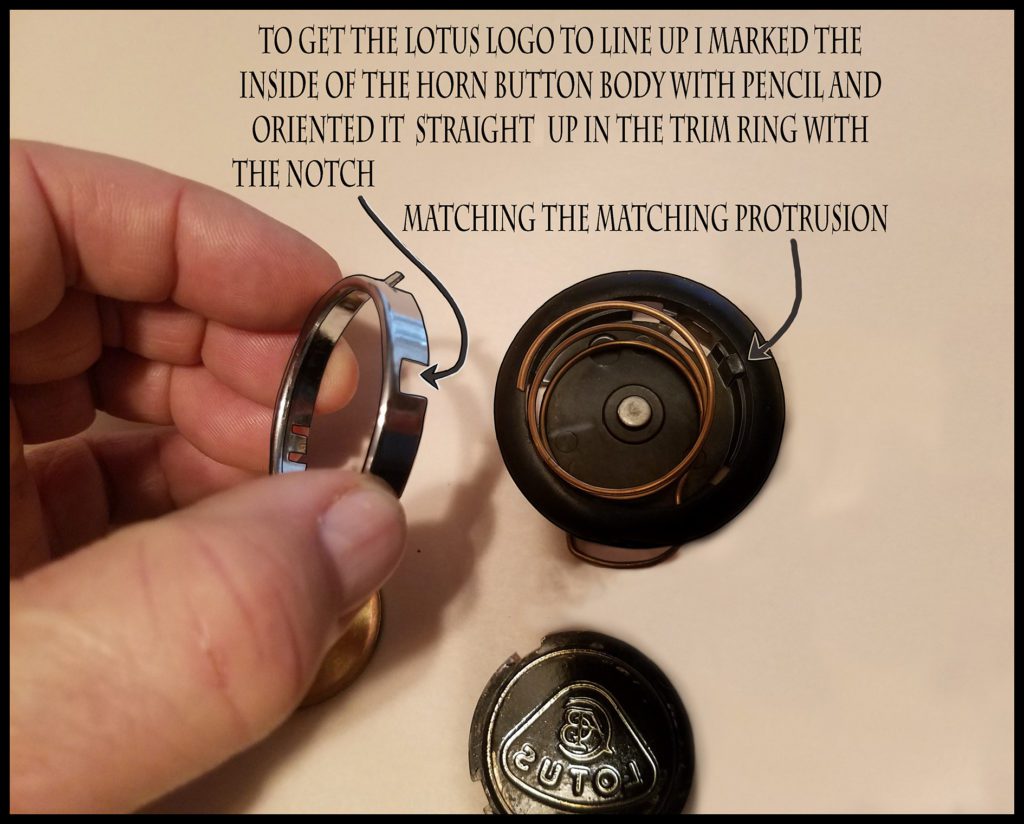
Original 1969 horn button from the center of the steering wheel
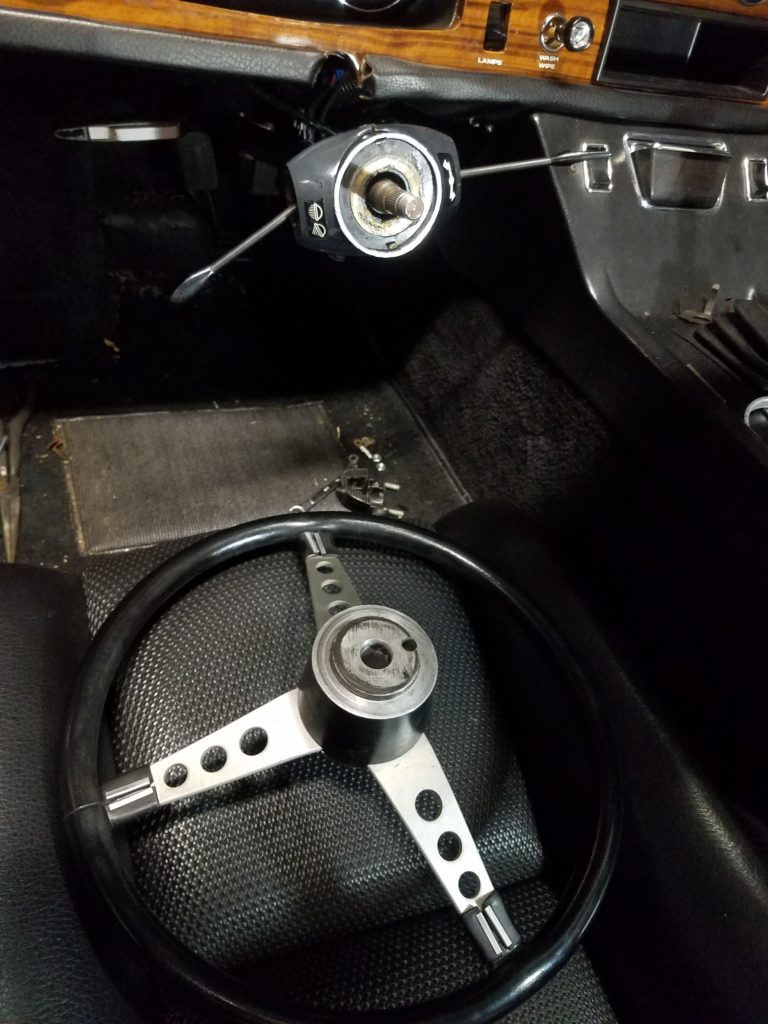
steering wheel without the horn button. Plunger is in place. I found a socket for the nut and took that off. Then I put knees behind the wheel and pulled it out while tapping on the center shaft.
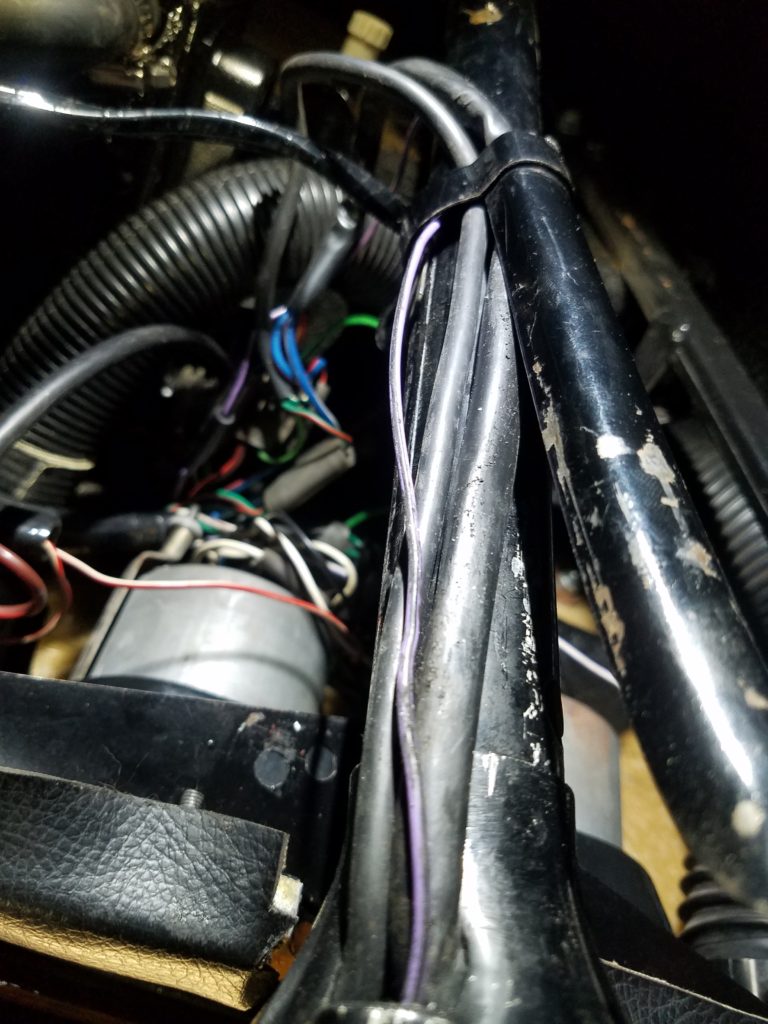
With the wheel off the horn contact ring was visible and you can see the hole for the contact plunger in the wheel. Next I released the light and signal controls and checked them out. Then I looked for kinks or binds or shorts in the black and purple horn wire.
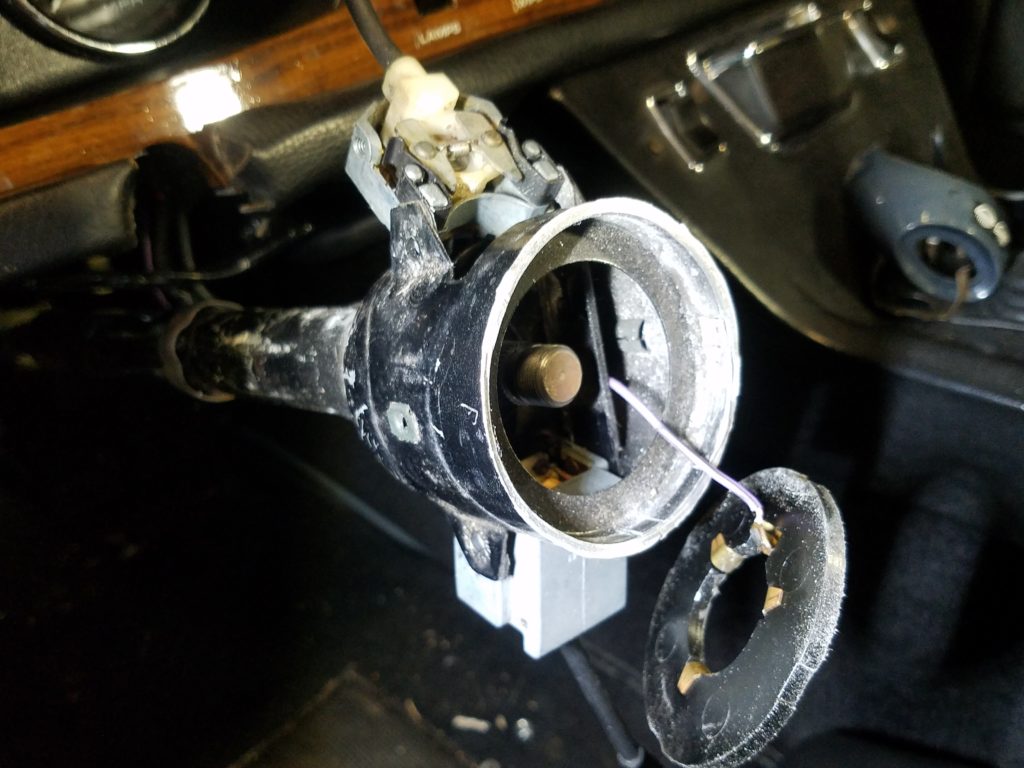
See how fast we forget? I remember the horn wire as black purple. it’s white purple. There were no shorts to ground. In fact, the way the circuit works is that the horn wire simply completes the ground circuit. The horn button is a switch. There is no energized wire except for the signal assemblies.
Under the dash board this is the steering wheel and the turn signal and light control wires. See the tach and speedometer. You are seeing a Lotus Position view. You are on your back with your feet up in the air outside the car. It’s all too close for your nose. Pinocchio could not service one of these cars.
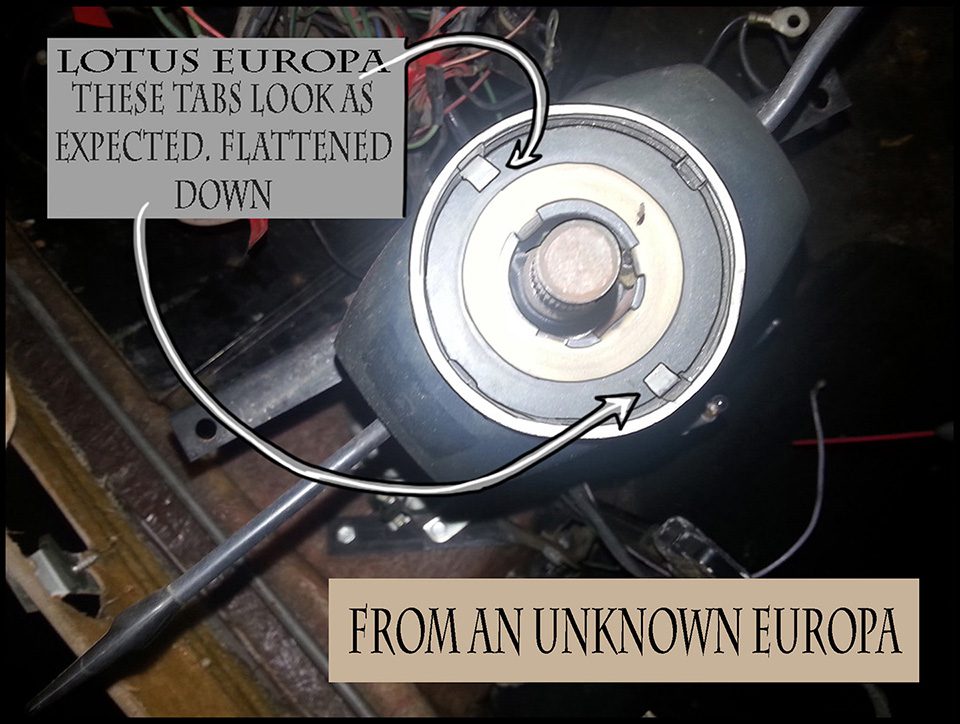
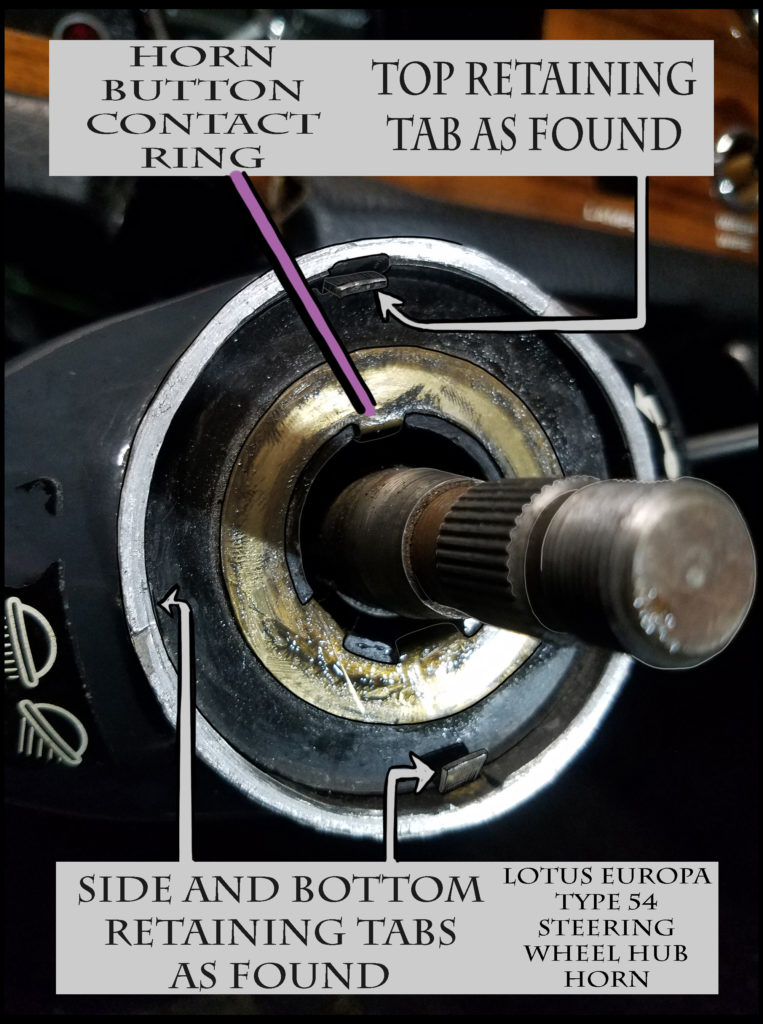
I cleaned off the grease and pushed down the tabs
A previous owner could not get the horn to work, and thought it was because the contact plunger was too short. In a genius act, they bent the horn button contact tab to correct it. I had to undo this and service the contact plunger.
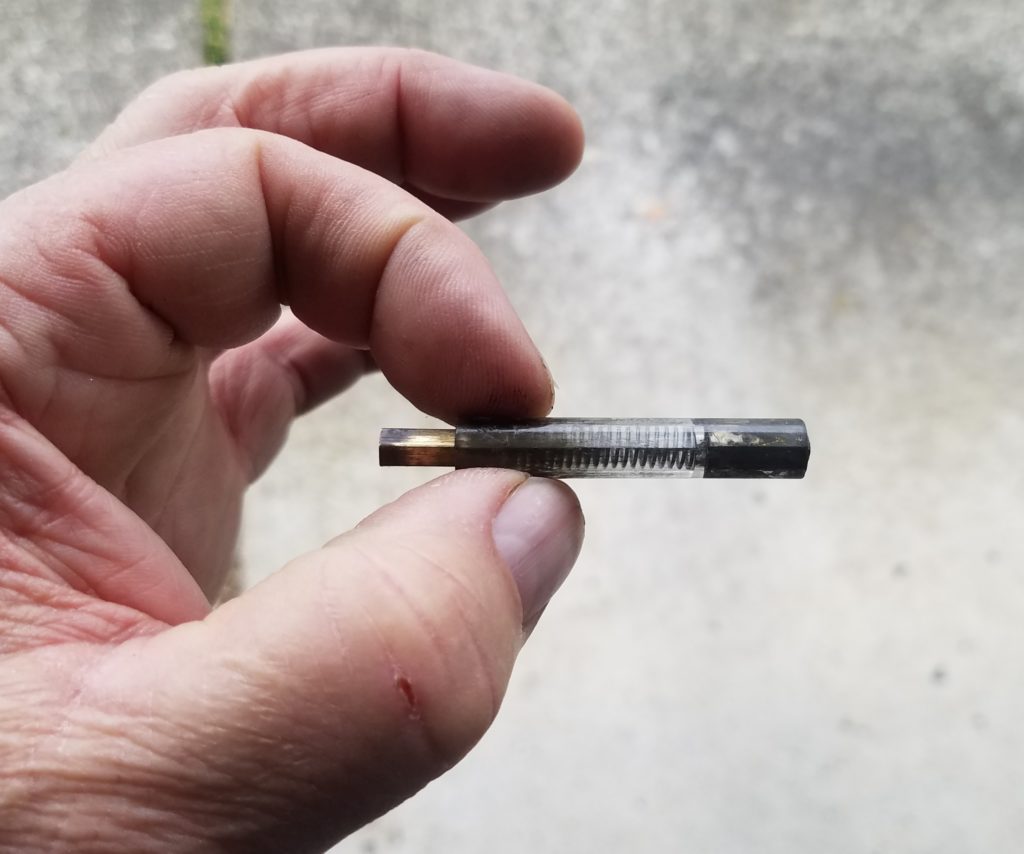
steering wheel horn contact plunger. At the brass end it contacts with the horn button and that pushes the other end onto the contact ring. It was just dirty and was dragging.
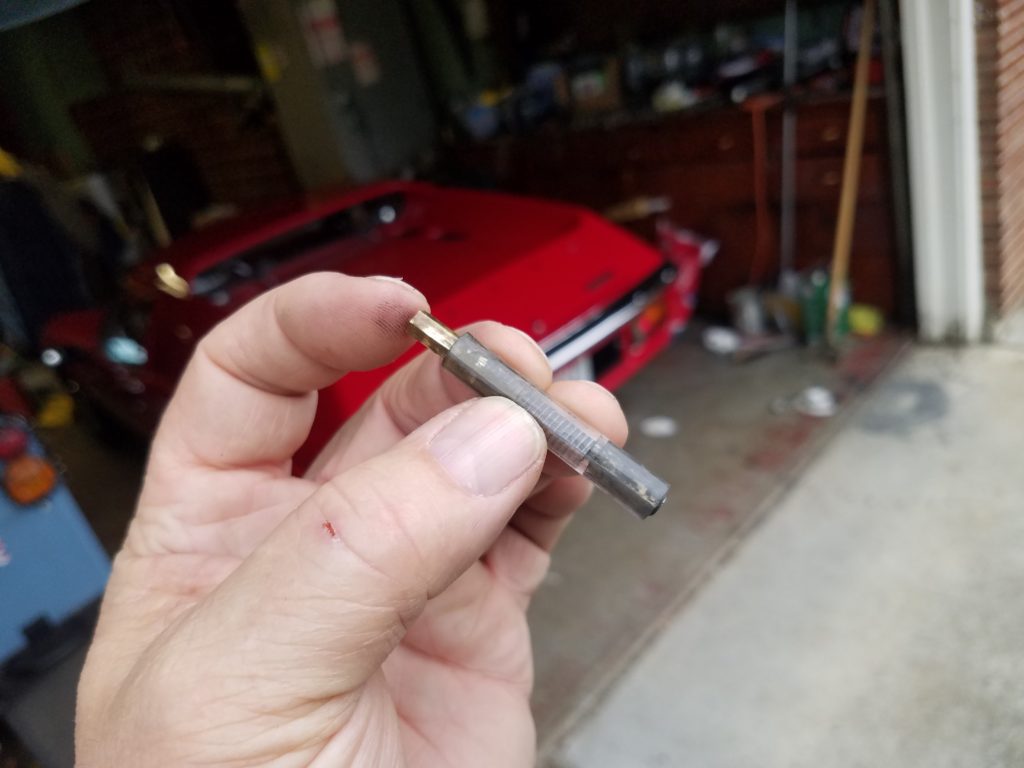
retracted
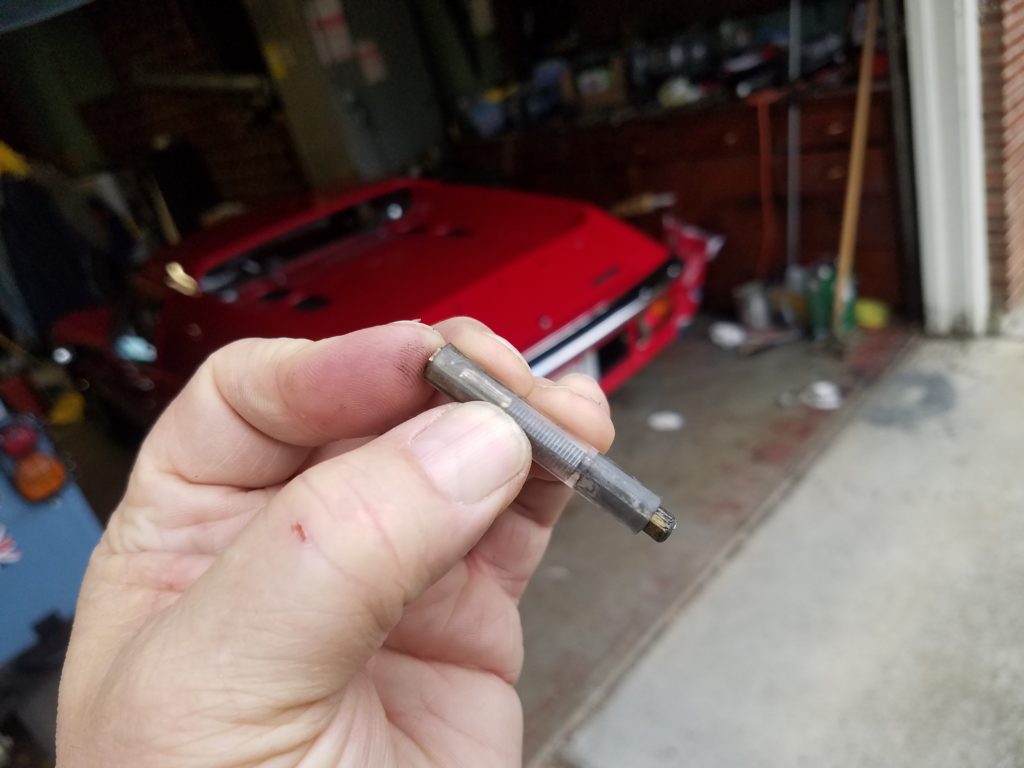
plunged
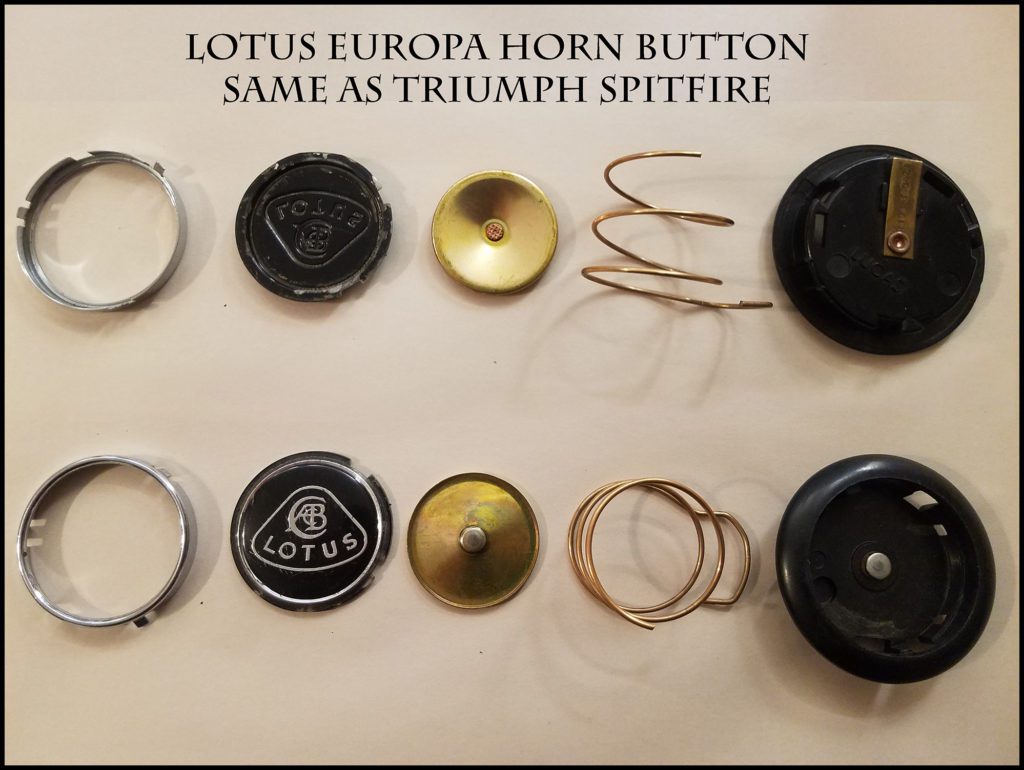
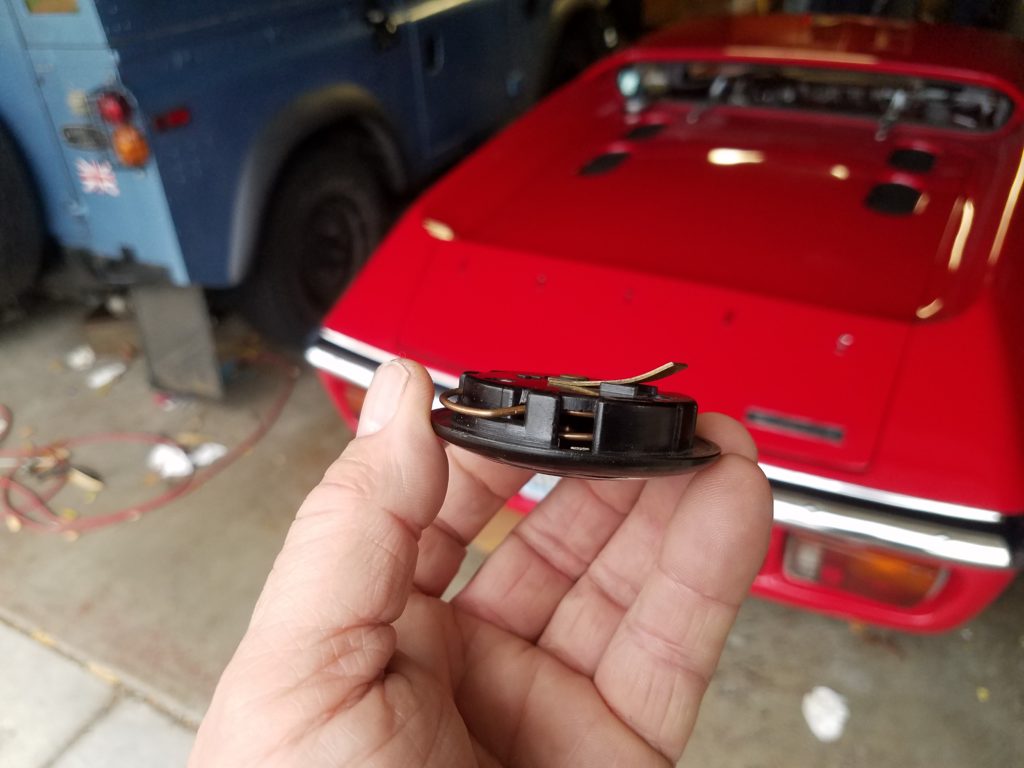
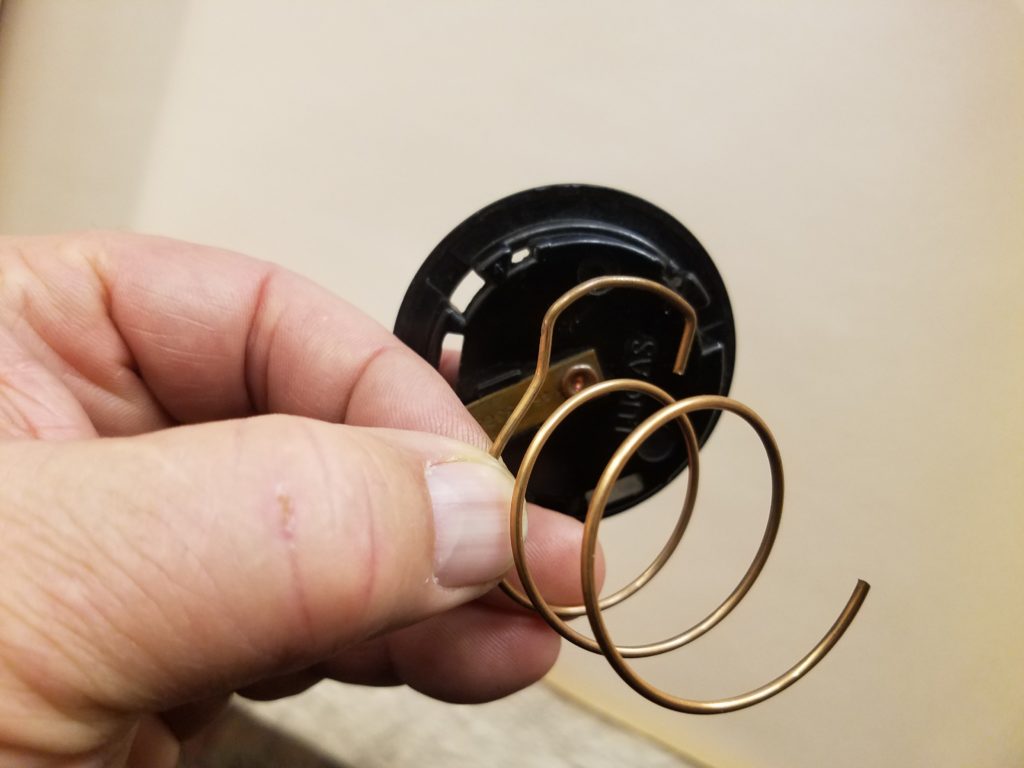
horn button taken apart, front and back and in one case side views of each piece
If you do this, be easy on the little tabs. Others have reported that their broke off.
This piece slides into a slot and out of another and otherwise is just held in place by the tabs on the horn button trim
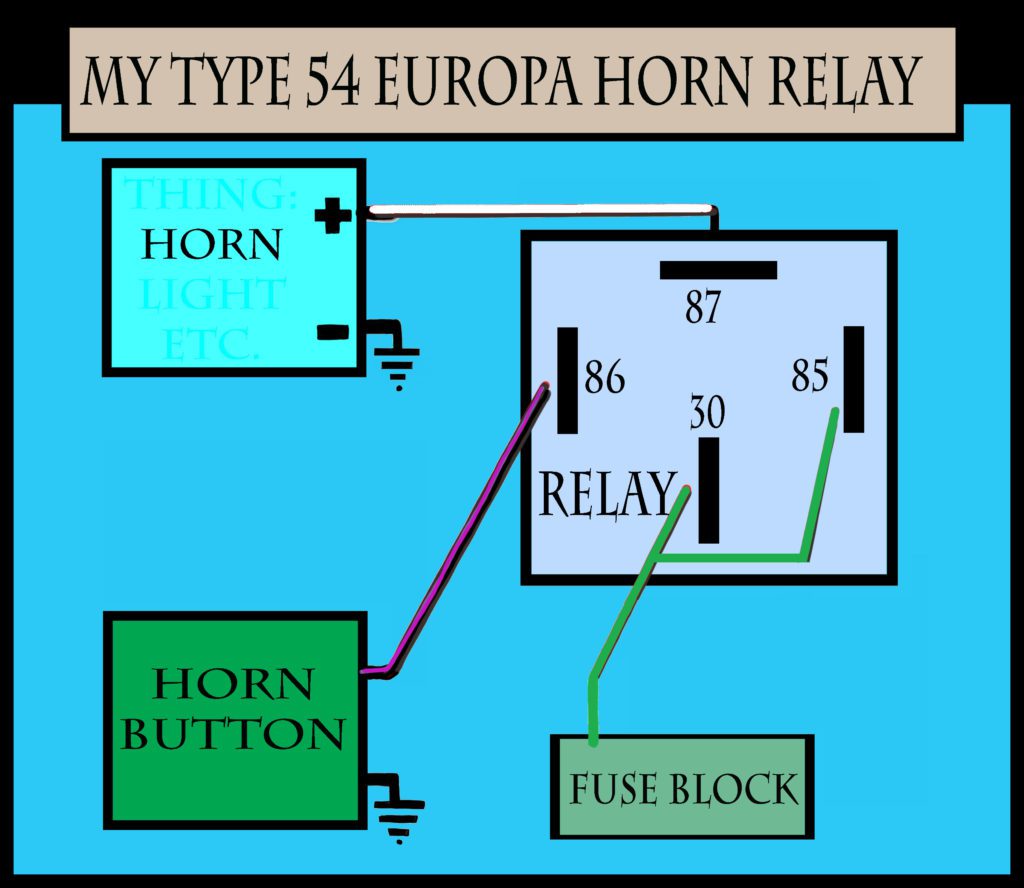
The Europa had a horn relay but I wasn’t sure how it should be connected. I devised this after a comment from a Swedish Europa owner made a comment that caused me to revise my understanding. I had thought that the horn button wire was electrified, but in fact it is just a ground circuit. When I realized that, everything fell into place and this is how I connected the wires to the horn relay.
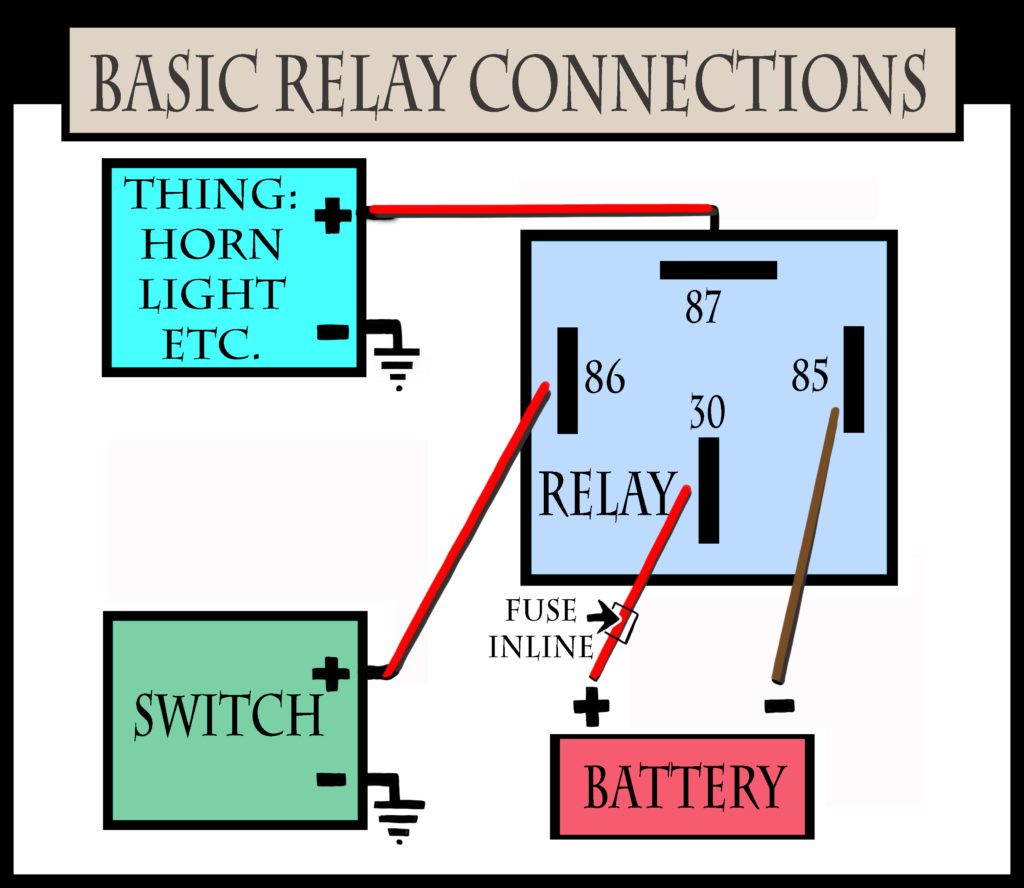
This is a commonly wired depiction of an automotive relay and is what I will use to add any accessory other than the radio. That will connect to the ignition switch in the Europa where two or three spades await it.
Now the Europa has a decently persuasive horn that works when and how it should.
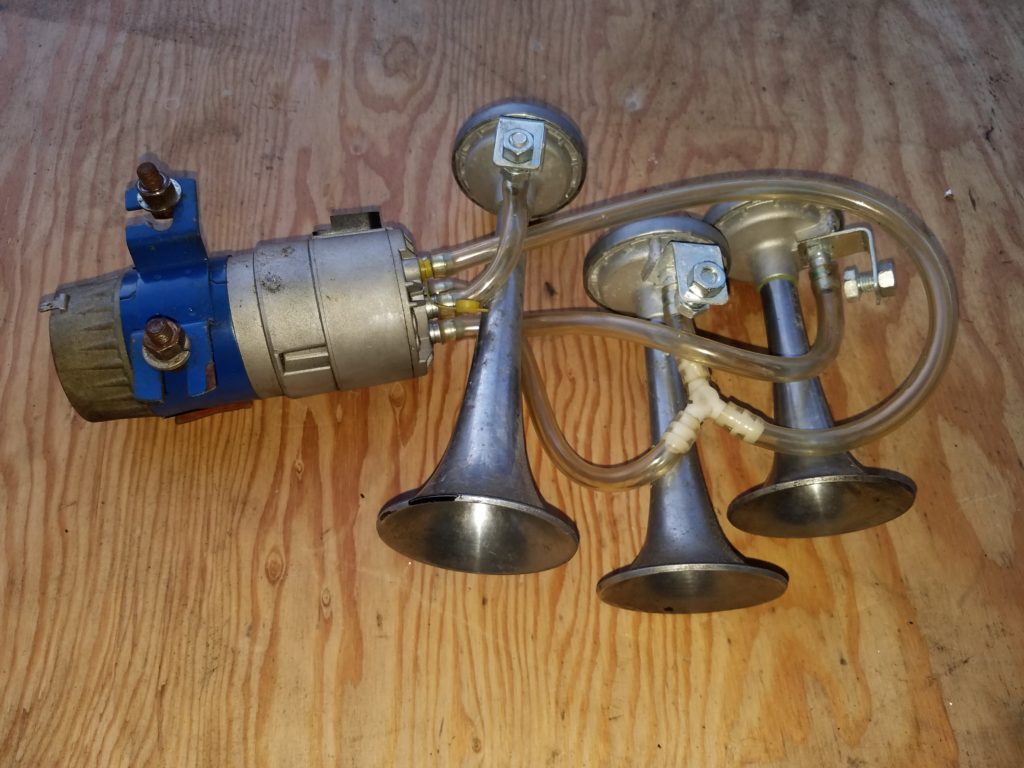
Old Italian air horns that came with the car when I bought it
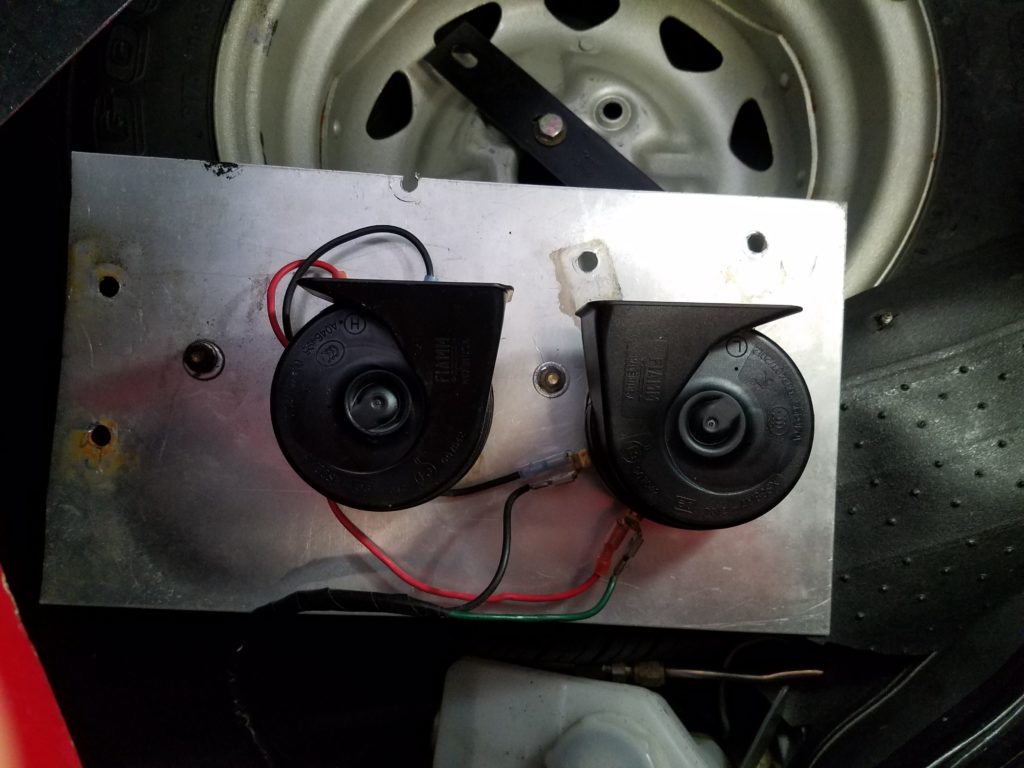
Modern, infinitely superior fiamm “freeway blaster” high and low on their panel that was next installed in the front boot out of the way. Loud. Satisfying.
While I was at it I figured out how to replace the lock barrel in the ignition switch so now I have the original ignition key in use again!

Rather than risk it using my reassembled ignition switch, I put in a new one. Now things have calmed down so I could maybe use it and sort it but instead, I removed the lock cylinder and put it in the new switch. easy peasy
The switch looks much better. I lost a little washer last time I installed one. That thing couldn’t wait to get lost for this installation too, but I got magnets and lights and conducted a search and rescue and found it. So this is a proper install.
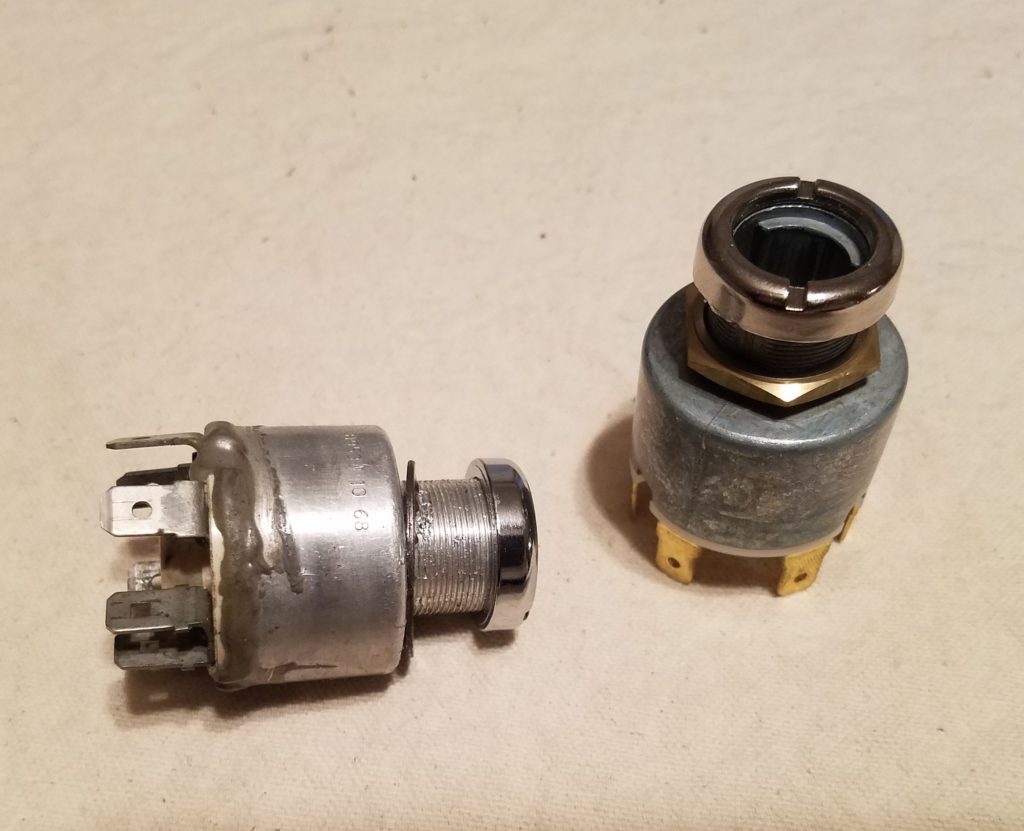
Old lock from October 1968 and a new barrel-less switch
